martes, 27 de septiembre de 2016

THE AMAZING MIDDLE AGES


The middle ages were a very interesting time it came about after the collapse of the Roman Empire. Different leaders tried their best to create their own empires, which did not last. 


COAT OF ARMS
 
In medieval times, every noble family wanted everyone to know how important they were.
 They also wanted to brag about their history. 
Since most people could not read, heraldry was invented. 
This was a way to brag about who you were without using words.
Heraldry was a design and short saying. 
Noble families designed a coat of arms that incorporated their heraldry (their design and short saying). 

They put their coat of arms, showing their heraldry, on banners, shields, tapestries and anything else they could think of. 
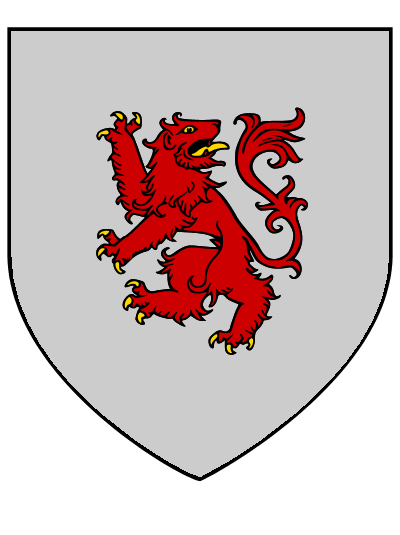
Each part of the coat of arms has a specific meaning. Animals or objects were used to describe character traits - brave as a lion, for example. 
The colors were used as symbols of character.
Each heraldry was unique. 
There are many books describing what each of the symbols mean. 

Now it's time to design your own coat of Arm

and if you click on the image below you can play some games on line

http://medievaleurope.mrdonn.org/games.html


miércoles, 18 de mayo de 2016

WORKING ON ALEXANDER CALDER

Alexander Calder was an American sculptor who made kinetic sculptures. This meant that a lot of his sculptures were made to move. 
He made mobiles that hung from the ceiling and loved music, dancing and the circus!

Goldfish Bowl 1929

Let's have a look to this video and watch some interesting Calder's work


Now it's your time, create your mobile inspired on Alexander Calder


domingo, 14 de febrero de 2016

NOTANS

"Notanarama"


Notan is a Japanese design concept focussing on the relative placement of light and dark within a composition.
 It's like ying and yang.
This use of light and dark translates shape and form into flat shapes on a two dimensional surface.
Notan is traditionally presented in paint,pap ink, cut paper, but it's relevant to a host of modern day image making techniques, such a lithography in printmaking and rotoscoping in animation.

We  can start our work with a  black square, triangle, rectangle or circle to represent shapes.


domingo, 3 de enero de 2016

MOVEMENT WITH LINES

This is a great project that uses only a couple of supplies (and a bit of patience) to create a piece that transforms from "ho-hum" into "WOW!" This is a great way to illustrate how various lines can show movement. 
Horizontal lines are sleepy and calm. Vertical lines are strong and stand still, but diagonal lines seem to slide and move, bringing our eye from one side of the page to the other and then "whoosh!" off the page! We start off this exercise by using the ruler to create a series of diagonal lines and color them in with markers. Then, we cut the piece up and fan the strips out and create another type of line...a swirly, curving line that also shows movement! This is also a nice op-art activity. You can use complementary colors for your diagonal lines or a full rainbow of color. Experiment and enjoy the process!

Movement With Lines
Supplies Needed:
  • One sheet of white construction paper, 9"x12"
  • One sheet of black construction paper, 12"x18"
  • Ruler
  • Pencil and eraser
  • Markers, assorted colors
  • Glue sticks
Directions:
1. Draw a series of diagonal lines on the white construction paper. You can draw three smaller lines going across the page or fill the space with lines. Both look great, in my opinion.

2. Color in the diagonal lines using markers.


This is the "Before" Photo

3. Flip the page over and divide the page into twenty-four 1/2" wide strips. Use your ruler for this and try to be as precise as possible. BEFORE you cut the strips apart, number them on the back from 1-24 at one end (the same end of the strips for all numbers).

This photo is kind of hard to see, but it shows all of the strips
numbered on the back at the same end.
Now, this is where it gets a little bit tricky. I'm sure you can do this many ways, but I made three of these and I finally landed on this way of doing it.
4. Cut out the strip marked #12. Put glue on the back and glue it on your black construction paper background in the middle, like this:


Strip # 12 glued on in the center
of the black paper (hold the black
construction paper vertically)

5. Now you can cut strip #11 out and put glue on the back of it. Overlap the left edge of the strip over the left edge of the previous strip (in this case, strip #12), fanning the right edge out slightly (about 1/2"). Repeat with strips 10-1 (working away from you) until you get through strip #1, forming a nice curve with the strips. Use the photo as a guide.

7. Once you have finished gluing down strip #1. Place glue on the back of strip #13 and overlap the right edge of the strip over the right edge of strip #12, fanning the left edge down slightly (about 1/2").

8. Repeat with strips 14-24 until you get through all the strips, forming a nice curve in the opposite direction with the strips. Use the picture as a guide.


It is OK if the ends of the strips continue off the edge of the page. You can leave them that way or trim them to the edge of the black construction paper.

This project is good for the older child since they may be more tolerant of cuting up their artwork and transforming it into something else. Also, they are more capable of handling the precise measuring and cutting this project needs in order to be successful. It took me three times to get all the strips to fit on the black construction paper properly. But I really liked all of the other attempts I made too. It's an experiment, so don't get too stressed!

Enjoy!
THANKS TO CREATE ART WITH ME BLOG who gave me this great idea to work with my kids.

LINES AND MOVEMENT IN ART

Varying the lines you use, creates a more interesting drawing. 
 By Rachel Wintemberg
This drawing uses straight lines, curved lines, thick lines, thin lines, hatching, cross-hatching, spirals, scribbles and zig-zags.
You can understand in the same picture with the numbers of different type of lines
Artists use line to express volume
Using the worksheet below, try adding different types of lines to transform flat shapes into three-dimensional forms


 Carl Krull
an artist who uses line to express volume:


Artists use line to express movement.

Some examples of illustrations that use lines to express movement 
by
Arthur Rackham


This illustration depicts a windy day. 
How do we know it is windy? 

Who Has Seen the Wind?


Who has seen the wind?
Neither I nor you.
But when the leaves hang trembling,

The wind is passing through.

Who has seen the wind?

Neither you nor I.

But when the trees bow down their heads,

The wind is passing by.


If wind is invisible, as the poem says, how can we draw it?

Can you use your knowledge of different types of lines to create a picture that shows a windy day?

Here are some  photographs I found on the Internet of windswept trees to get you started.


Try to create movement in a big poster all together


How did Vincent Van Gogh depict movement in his famous painting, Starry Night
What type of lines did he use?


Let's have a look to this video


How did Katsushika Hokusai use line to express movement?


Practice using line to show movement by looking at this waterfall in slow motion: 
How would you draw the lines that show the falling water?
What sort of lines would you draw to show the water splashing up?
How many different types of lines do you see?
How can repeating a line many times in a rhythmic pattern increase the feeling of movement in a picture?
 How can varying the thickness of a line and the distance between rhythmic lines help to express movement? 

Waterfall In Slow Motion from Rachel Wintemberg on Vimeo.


Artists use line to create rhythmic designs and patterns.
This is particularly useful for designing fabrics or wallpaper. 


If you repeat a line, or create a repeating pattern using a series of lines, your artwork will have a sense of rhythmic movement.


These are some examples for you to have a look and work.
Varying the line width and adding shadows will make your picture more interesting to look at.


THANKS to The Helpful Art Teacher, an interdisciplinary website linking visual arts to math, social studies, science and language arts.